


There is something about a kitchen full of peaches that makes the whole house feel cared for.
A bowl of warm-colored fruit on the table. A clean towel spread across the counter. A child asking whether this apple is ready, while another writes the date on a crooked little label. Outside, the garden is still giving. Inside, someone is thinking ahead.
Not just about supper tonight, but about the chilly evening months from now when those peaches will find their way into a bowl.
That is the heart of home canning: taking what a season gives us and making room for it in the seasons ahead.
For families who grew their own food, preserving the harvest could be part of the household rhythm. Plant, tend, gather, prepare, put away. A pantry was a practical expression of care, with tomorrow's meals lined up on the shelves.
We can bring some of that feeling into our homes today. We can grow a little, preserve a little, teach a little, and feel the quiet satisfaction of knowing how something reached our family's table.
And we can do it with the knowledge we have now, using safe, tested methods that make this lovely old tradition fit the lives we actually live.
A jar of summer on the shelf is a small act of care for the table you will set tomorrow.
What Is Home Canning, and Why Does It Matter?
Home canning preserves suitable food by processing it in jars with a tested heat treatment and forming a reliable seal. It can help families use seasonal harvests, reduce avoidable waste, and keep useful ingredients on hand. Most high-acid fruits can follow tested boiling-water methods; meats and plain low-acid vegetables require pressure canning.
The method matters because a pantry jar will sit at room temperature. A recipe that is perfectly good for tonight's supper may need refrigeration, even when it has been poured into a jar.
The National Center for Home Food Preservation explains that canning controls spoilage through appropriate preparation, heat processing, and sealing. The jar is one part of the system. The food and its treatment matter just as much.
Think of canning as a way to organize the distance between harvest and dinner. We do some careful work while food is available so there is less to do when we need it.
That connection is especially lovely when the food began in a garden you have watched all summer.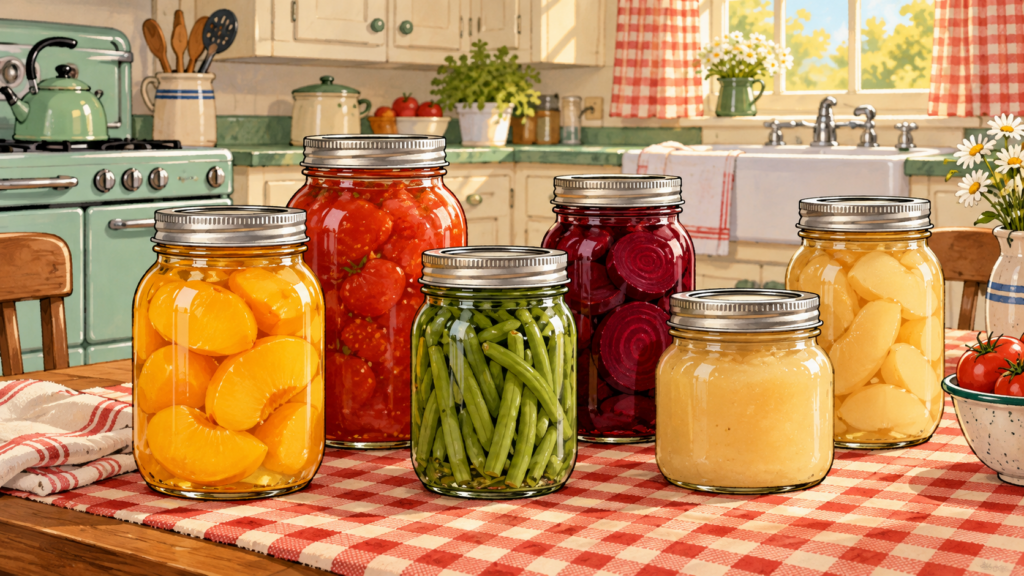
The Benefits of Canning Your Own Food
You Give a Good Harvest Somewhere to Go
A garden does not consult the family calendar.
Tomatoes arrive when they are ready. An apple tree may give far more fruit than anyone wants to eat in a week. A neighbor may appear with a basket and that familiar sentence: “We thought you might like some.”
Preserving gives suitable food another useful destination.
It also changes how you look at abundance. Instead of wondering what to do with every basket, you can decide what belongs on tonight's table, what can be shared, and what can be safely saved.
The most useful jar is one your family will open. If everyone enjoys applesauce but nobody likes pickled beets, your pantry has already told you where to begin.
Also Read 👚The Power of D-Limonene: A Smarter Way to Remove Stains Naturally
You Learn More About Your Ingredients
When you preserve food, you handle it. You notice which apples are firm, which peaches are ripe, and how much work hides inside a jar of sauce.
You can choose ingredients your family enjoys and select tested recipes that suit your preferences. Depending on the recipe, there may be safe options for sweetness or optional salt.
Those choices belong within the recipe's directions. Ingredients that establish acidity, thickness, or safe processing cannot simply be adjusted to taste.
There is comfort in that kind of knowledge. You know what you used, where it came from when you know the grower, and which method you followed. Keep the recipe with the batch notes, and that knowledge stays useful long after the counter has been wiped down.
You Build a Pantry That Helps With Ordinary Life
Preparedness can be as ordinary as Tuesday.
A jar of applesauce beside lunch. Properly canned meat added to a meal using the recommended preparation before serving. A jar of tomatoes waiting for the evening when the grocery trip did not happen.
A pantry works best when it reflects the meals you already make. It can support your shopping and cooking without requiring you to preserve every ingredient your household will ever eat.
There is no prize for having the most jars. There is real value in having the right ones.
Also read 👚The Problem With One-Size-Fits-All Cleaning Products | Shellee’s Green Clean
You May Save Money, With a Little Honest Accounting
Home canning can make financial sense when you have an abundant garden, reasonably priced seasonal produce, or reusable equipment you already own.
But the fruit is only part of the cost.
Add jars, new lids where required, energy, ingredients, equipment maintenance, storage space, and your time. If you are starting with purchased equipment and expensive fruit, the first season may cost more than buying comparable canned food.
That does not make the work pointless. It means you can decide what it is worth to you with both feet on the kitchen floor.
A simple comparison helps: divide your batch cost by the number of usable jars, then compare jars of similar size and contents. Keep the enjoyment and learning in a separate column. They count, too, even when they do not appear on a grocery receipt.
You Pass Along a Skill Children Can See
Children can watch a seed become a plant and a plant become something the family eats.
They can help sort sound fruit, count empty jars, draw labels, record the harvest, and decide which recipe the household wants to make again. Adults handle heat, hot jars, pressure equipment, and sharp tools.
The lesson reaches beyond canning.
Food takes time. A harvest deserves attention. Someone plans ahead. Work can be shared.
A child who labels six jars may remember that afternoon long after the applesauce has disappeared.
Also Read 👚Essential Oils vs Fragrance Oils: What’s the Real Low-Down?
How Canning Began: From Glass Bottles to Tin Cans
People preserved food through drying, salting, smoking, fermentation, and other methods long before canning existed.
Canning introduced another possibility: treating food with heat inside a sealed container so it could be kept for later.
The National Archives' history of tin cans and patents describes the work of Nicolas Appert in France, who developed preservation in sealed glass containers and published his method in 1810.
That same year, Peter Durand obtained a British patent covering food preservation in containers including tin. The Archives notes Philippe de Girard's contribution to the process Durand patented. Bryan Donkin and John Hall subsequently developed commercial production using tin-plated iron containers.
The familiar “tin can” was not necessarily solid tin. Tin plating covered an iron container, providing a practical vessel for preserved food.
These developments helped food travel and remain available beyond the place and season where it was produced. Their origins included the demands of provisioning armies and ships, but their influence eventually reached everyday kitchens.
A later milestone brought preservation closer to the household pantry. John Landis Mason's 1858 screw-top glass jar patent became part of the development of the reusable canning jar, as documented by the Smithsonian.
The technology changed, but the household question was familiar: How do we make today's abundance useful tomorrow?
Also Read 📖Welcome to Shellee’s Green – Nostalgia, Family & Honest Living
The Lead Solder Chapter of Tin Canning
The history has a less cozy chapter, too.
Some metal food cans were manufactured with lead-containing solder used to join seams. Lead from that packaging could contaminate food.
In its June 27, 1995, final rule on lead-soldered food cans, the FDA prohibited introduction into interstate commerce of food in cans made with lead solder. The rule provided a six-month effective period and a separate transition for existing stocks.
The FDA also noted that U.S. food manufacturers had already eliminated lead solder from their food cans by the time of the rule.
This is an important distinction: historical lead-soldered metal cans and today's home canning in suitable glass jars are different packaging systems.
It would be misleading to suggest that all current canned food carries the old solder problem. It would be equally unwise to use antique canning equipment simply because it looks charming.
An old jar may deserve a place on the windowsill holding flowers. Use currently recommended jars, closures, and equipment for shelf-stable food.
The best traditions leave room for what we have learned.
Also read 👚The Problem With One-Size-Fits-All Cleaning Products | Shellee’s Green Clean
How Much Food Did Families Put Up for Winter?
Those shelves of jars were often planned well before the harvest arrived.
A 1938 USDA bulletin advised families to prepare a canning budget that considered household size, the period when fresh foods were unavailable, available crops, equipment and container costs, and the value of the labor.
That is a remarkably practical list.
A 1947 University of Nebraska Extension circular addressed fruit and vegetable quantities for a 36-week period. Its description distinguishes needs by age group and includes canned, frozen, and dry-stored foods.
These records show how deliberately families and educators approached the months between harvests. They do not establish one universal jar count for every historical family.
The amount depended on climate, household size, appetites, crops, resources, and other foods available. A family using a root cellar, dried beans, purchased flour, stored potatoes, and fresh milk would have a different preservation plan from one relying more heavily on canned produce.
A wall of fruit and vegetable jars was not, by itself, a complete annual diet.
The useful lesson is the planning habit: count the meals ahead, then work backward toward the harvest.
Also Read 👚Essential Oils vs Fragrance Oils: What’s the Real Low-Down?
How Many Jars Might Your Family Need?
Start with how often you will open a jar.
Estimated jars needed = jars used per week × weeks you want covered.
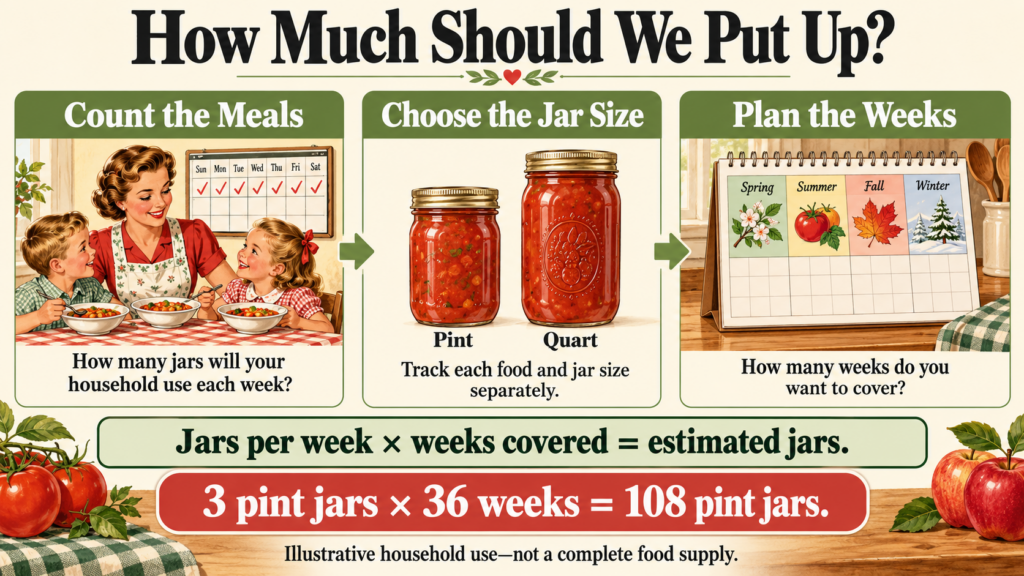
That is a planning equation, not a nutritional recommendation or a historical quota.
For an illustrative household using preserved foods over 36 weeks, the arithmetic might look like this:
| Food | Assumed Household Use | 36-Week Total |
|---|---|---|
| Applesauce or canned fruit | 3 pint jars per week | 108 pint jars |
| Plain vegetables, pressure canned | 2 pint jars per week | 72 pint jars |
| Tomatoes made with a tested process | 1 quart jar per week | 36 quart jars |
| Meat made with a tested pressure process | 1 pint jar per week | 36 pint jars |
| Total | 7 jars per week | 252 jars |
This example represents selected ingredients for a household, not enough food to feed a particular number of people for 36 weeks. It does not account for a complete diet, calories, individual serving needs, or foods purchased elsewhere.
It also contains different jar sizes. The 252 jars equal 144 quarts of container capacity, not 252 quarts of food.
If you want eight jars a week for 40 weeks, that is 320 jars. If you want two a week for 20 weeks, that is 40. Both can be sensible goals, depending on your life.
For a first season, a smaller batch offers better information than an ambitious guess.
Record what gets eaten. If the last jar of applesauce disappears in February but the relish is still there in June, your family has written next season's plan for you.
Before enlarging the garden, check storage, time, equipment capacity, and the amount of fresh food required by the selected recipes.
A harvest plan needs a processing plan. Otherwise, abundance can arrive faster than anyone can reasonably manage it.
Plan the Garden Around the Meals You Want to Make
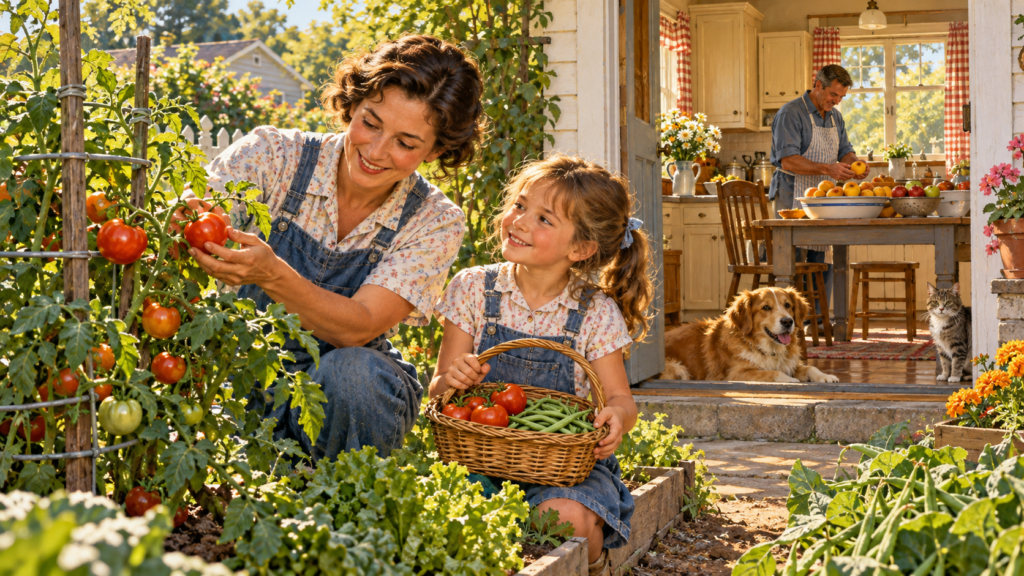
A productive garden and a useful pantry are related, but they are not exactly the same thing.
Begin with a short list of foods your household already enjoys. Then find current tested preservation recipes for the crops you are considering.
That order helps you avoid growing a great deal of something without a safe preservation method you want to use.
Consider the finished food, too. A tomato grown for slicing may not be your favorite choice for sauce. A crop may produce more than you can process comfortably in one week. Some vegetables may suit freezing better than your household likes them canned.
A garden notebook can be beautifully plain:
- What you planted and when.
- Approximately how much you harvested.
- Which tested recipes you used.
- How many jars you made.
- Which foods the family actually ate.
- What you would grow more or less of next year.
You do not need acreage to begin. You can also preserve suitable seasonal food bought from a farm stand or shared by a neighbor.
The relationship with food grows through attention, even when the tomatoes began in someone else's garden.
Also Read 📖The Problem With One-Size-Fits-All Cleaning Products | Shellee’s Green Clean
Canning Fruit: A Gentle Place to Begin
Fruit gives a pantry color and possibility: applesauce for lunch, yellow peaches for a winter dessert, pears for the table.
Many familiar fruits can be processed using a tested boiling-water canning recipe. The recipe determines preparation, packing liquid, headspace, jar size, processing time, and elevation adjustments.
Fruit does not mean “anything sweet is safe to can.” Check the specific variety and product.
For example, the NCHFP yellow-peach directions specifically exclude white-fleshed peaches. The Center recommends freezing white peaches because it does not provide a researched acidification or pressure-canning process for them.
The yellow-peach directions allow specified packing liquids, including water, juice, or syrup. The complete recipe still needs to be followed.
Jams and jellies have their own rules. A low-sugar fruit spread requires an appropriate tested recipe; reducing the sugar in an ordinary jam recipe can change the product.
A small batch of one familiar fruit is a pleasant first project. It lets you concentrate on the process rather than juggling several recipes at once.
Choose something you can picture serving. That picture of a future meal gives the work a lovely purpose.
Also Read 👚What Fabric Softener Really Does to Your Clothes
Canning Vegetables: Know Which Method Your Harvest Needs
The basket may look much the same coming through the back door, but different foods need different treatment.
Plain green beans, carrots, corn, peas, and other low-acid vegetables require a tested pressure-canning process. A boiling-water bath does not make them shelf stable safely.
A tested pickled vegetable recipe is a different product. Its specified acidity is part of its preservation system. Do not turn a plain vegetable recipe into a pickle by adding a casual splash of vinegar.
The NCHFP guidance on safe canned foods explains that acidity and processing determine the appropriate method.
| Food or Product | Method to Look For |
|---|---|
| Many high-acid fruits | Tested boiling-water process |
| Tested acidified pickles | The exact process specified by the tested recipe |
| Plain low-acid vegetables | Tested pressure-canning process |
| Meat, poultry, and seafood | Food-specific pressure-canning process |
| Tomatoes and tomato mixtures | Exact tested recipe, including required acidification and processing |
The table is a starting point for choosing instructions, not a substitute for a recipe.
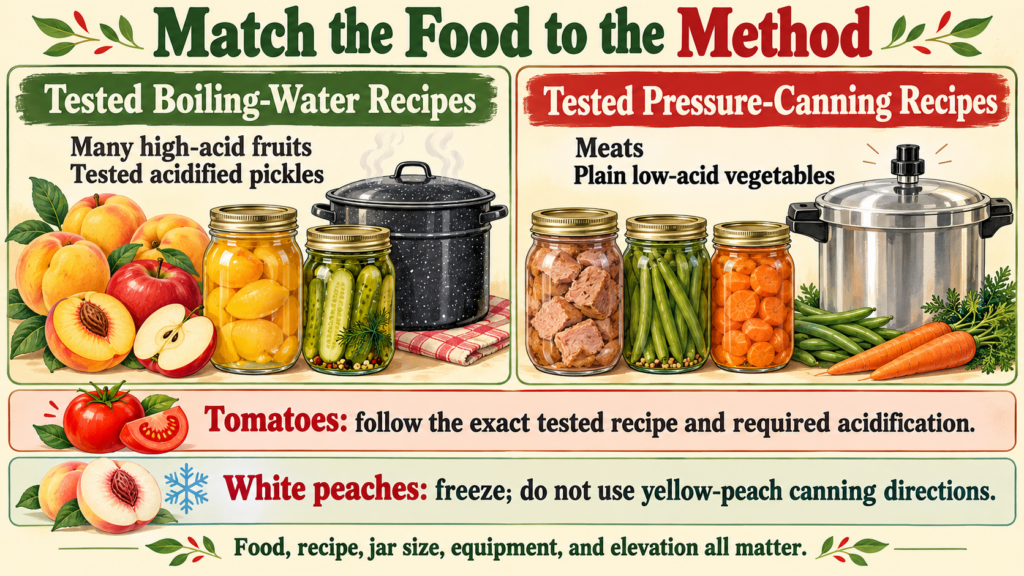
For whole, crushed, or juiced tomatoes, the NCHFP acidification directions require specified acid even when using their pressure-processing options. Follow the exact product's directions rather than guessing from the tomato's flavor.
You can have a simple pantry and a careful process at the same time.
Canning Meat: A Useful Skill With Its Own Rules
Properly canned meat can be a useful pantry ingredient for future meals. It also asks for greater attention to equipment and food-specific instructions.
Meat, poultry, and seafood are low-acid foods. Use a suitable pressure canner and a current tested recipe for the exact food.
For example, the NCHFP directions for meat strips, cubes, or chunks distinguish hot and raw packs, pint and quart jars, and pressures for different elevations and gauge types.
The Center prefers hot packing for better liquid coverage and storage quality. Its raw-pack instructions differ, so the methods should not be blended.
“Canned meat” is too broad to supply one processing time. Chicken, fish, ground meat, and meat chunks have separate directions.
For home pressure canning, use the equipment called for by the research-based method. A small pressure cooker or ordinary electric multicooker is not a substitute for the pressure canner specified in those instructions.
Let the canner's directions and the tested recipe guide venting, timing, pressure, and natural cooling. If the recipe does not cover the food, jar size, or preparation you want, choose another preservation approach rather than inventing a process.
A canning day with meat also needs a separate, clean workflow so raw meat and its juices do not reach ready-to-eat food.
Start this skill when you have time to pay attention. It deserves an unhurried afternoon.
Also Read: The Science of Odor Elimination: What Freshener Companies Don’t Want You to Know
Bring Back the Tradition With Today's Food Safety
Old recipe cards can carry a person's handwriting, a kitchen memory, and a little of the love that went into feeding a household.
Keep those things.
Then compare the preservation directions with current research-based guidance before putting food on a pantry shelf.
The NCHFP's list of methods not recommended includes open-kettle canning and processing filled jars in ovens, microwaves, or dishwashers. A jar can seal after an inadequate process; a seal alone cannot prove safety.
Begin every batch with a current tested recipe from USDA, NCHFP, or a reliable university Cooperative Extension source.
Check the food, ingredients, preparation, jar size, packing method, equipment, and your elevation before starting. Keep the complete directions within reach.
Use sound food. Maintain a clean workspace. Follow the specified preparation and processing without improvising with thickness or ingredient proportions.
Cleaning the counter and preparing produce are useful kitchen tasks, but they do not replace the heat treatment needed for shelf-stable canning.
The CDC's home-canned-food guidance emphasizes that botulinum toxin cannot be detected by sight, smell, or taste. Never taste questionable food or eat a jar whose safe processing is unknown.
CDC also advises boiling home-canned tomatoes and low-acid foods before eating: 10 minutes below 1,000 feet, plus one minute for each additional 1,000 feet. This precaution does not rescue an improperly canned or suspect jar.
Following good instructions is a way of caring for the people who will open those jars.
Let the Children Help With the Memory
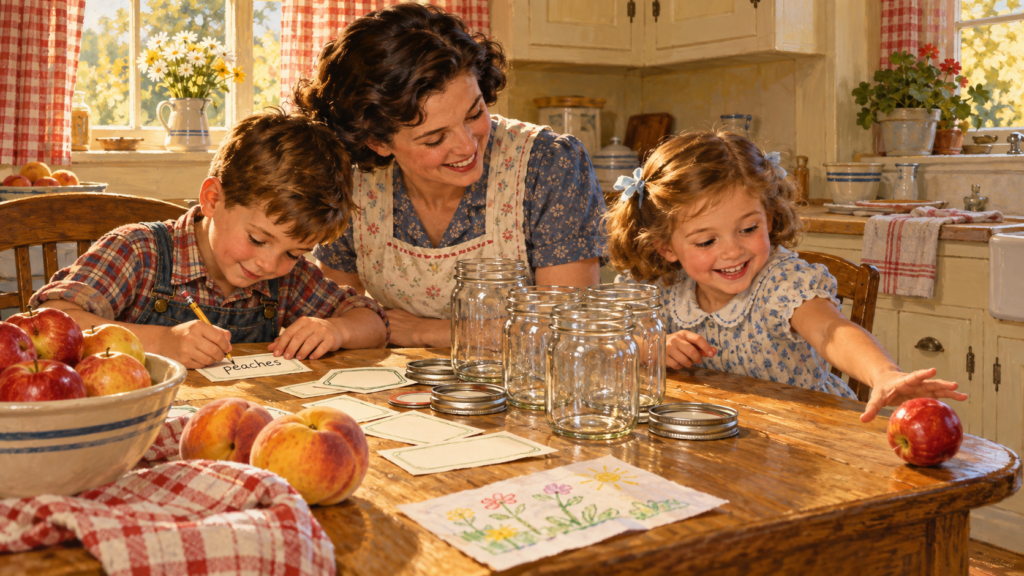
Imagine a 1950s kitchen with gingham curtains, a mother in a cotton apron, and two children who have taken the labeling job very seriously.
One apple rolls toward the edge of the table. Someone catches it. There is a laugh, a pencil with a worn eraser, and a small dispute over who gets to write “peaches.”
That is the kind of scene worth bringing into the present: children included in work they can safely do, with an adult close by and something useful being made.
Make room for age-appropriate jobs away from the stove. A child can count cool empty jars, sort sound produce under supervision, make labels, draw the garden, or help record which foods the family likes.
They can also see that a task has a beginning and an end. Gather the ingredients. Do the work carefully. Clean up. Put things where they belong.
The kitchen does not need to become a perfect picture. It needs to make room for real people.
Some of the dearest memories are made beside a bowl of apples while everyone is doing something ordinary together.
Whatever Happened to Processing Our Own Food?
The work did not vanish. The conditions around it changed.
The USDA National Agricultural Library's account of the postwar decline describes the ready availability of commercial canned goods after rationing ended and the growing popularity of household refrigerators.
Its historical summary reports a drop in home canning from 44 percent to 34 percent between 1954 and 1964. These are historical figures, not a measurement of today's households.
For a family doing hours of seasonal preservation work, convenience was a meaningful change. It could free time and make food available without a garden or a canning kitchen.
Today, a household may have limited space, a demanding schedule, nobody nearby to teach the process, or a budget that favors another way of feeding the family.
There is no need to scold anyone for that.
Still, something tender can be lost when useful skills stop being shared. A person may remember the jars but never have seen the recipe. A child may know that Grandma made pickles without knowing how she planned the season.
We can reopen that door in small ways.
Ask a relative what they used to preserve. Write down the stories. Take an Extension class. Find a current recipe for a familiar food. Invite someone to help with one manageable batch.
The tradition can grow around the time and resources you have now.
Make a Pantry You Will Actually Use
The shelf is not the finish line. The meal is.
A useful pantry connects each preserved food to a place in ordinary cooking: fruit with breakfast, applesauce with lunch, tomatoes in a planned supper.
Make a short list of those uses before choosing quantities.
Then put the jars where you can keep track of them. Date labels help you find older batches. A simple inventory tells you what is available and what should be used next.
You may discover that your household prefers smaller jars because opened food gets eaten promptly. Or that a quart size only makes sense for a particular meal. Use jar sizes supported by the tested recipe.
The NCHFP storage guidance recommends a clean, cool, dark, dry place and planning to use home-canned food within a year for best quality, unless product-specific instructions say otherwise. It recommends removing screw bands after jars are cooled and their seals checked.
That sunny row beside the stove may make a pretty picture, but a cooler, darker storage location is the better everyday home for the finished food.
Check jars before use. Keep questionable food away from children and pets, and follow official handling guidance if spoilage or unsafe processing is suspected.
Care continues after the canning day.
Common Myths About Home Canning
“If the Lid Seals, the Food Is Safe”
A seal shows closure. It does not show that the food received the correct process. The recipe and processing history matter.
“Everything Homemade Is Better for You”
“Homemade” describes who made it. Nutritional value depends on the food, ingredients, portions, and the rest of the diet. Safe home canning can support family meals without needing a sweeping health claim.
“An Old Family Recipe Is Automatically Safe”
A recipe can be precious and still need updated preservation directions. Preserve the story, and use current tested methods for shelf storage.
“Canning Always Saves Money”
Savings depend on ingredient prices, equipment, energy, lids, yield, and time. Run the numbers for your batch.
“You Have to Preserve Enough for the Whole Year”
Six jars can be a worthwhile beginning. A tradition is allowed to start small.
“Washing Food Makes Any Canning Method Safe”
Cleaning and safe preservation do different jobs. A washed ingredient still needs the tested process appropriate to that food.
A Small First Season Can Teach You Plenty
Try thinking in three stages: one batch, a few useful foods, then a season's plan.
With the first batch, learn the sequence. Notice how long preparation takes, where you can safely set jars to cool, and how much cleanup follows.
With the next few batches, learn your household. Which foods do people reach for? Which sizes are convenient? Which project feels worth repeating?
Only then decide whether a larger preservation goal fits.
For an illustrative first-season target, you might choose 12 pint jars of applesauce over several small batches using the same current tested recipe. That is a quantity goal, not permission to change the recipe or processing.
If your household opens one pint every other week, those jars cover about 24 weeks of that particular habit.
Keep the outcome in perspective. You have not produced a complete food supply. You have learned a process, saved some suitable food, and made one part of future meals easier.
That is useful work.
The next season can begin with experience instead of guesswork.
What You Should Do Next
You do not need a farmhouse pantry, a garden big enough to feed the county, or a kitchen that looks as though it belongs on a magazine cover.
Start with one food your family enjoys.
Find a current tested recipe. Set aside a manageable amount of time. Make room on the counter. Let a child write the labels, or invite someone you love to sit at the table and keep you company.
Perhaps it will be applesauce. Perhaps yellow peaches. Perhaps you will begin by taking a class and planning what to grow next spring.
The season you have is enough to begin with.
At Shellee's Green, we love the little things that make a home feel cared for: familiar meals, useful habits, a garden watched with interest, and work shared around the kitchen table.
Visit Shellee's Green for more stories about family, simple routines, and honest living. Then choose one small food tradition you would like to bring into your own kitchen.
When the cold weather comes and you open that first jar, you will have something lovely to serve.
You will also have the memory of making it—and the quiet pleasure of knowing that, months earlier, you were already caring for the people gathered at your table.
Frequently Asked Questions
What Are the Main Benefits of Canning Your Own Food?
Home canning can help you use suitable seasonal harvests, reduce avoidable food waste, keep useful ingredients on hand, and learn a practical household skill. Savings depend on your ingredient, equipment, energy, lid, and labor costs.
How Did Canning Food Begin?
Nicolas Appert developed preservation in sealed glass containers and published his method in 1810. Peter Durand obtained a British patent that year covering preservation in containers including tin. Later jar innovations helped bring canning into household kitchens.
Did Old Tin Cans Contain Lead Solder?
Some historical metal food cans used lead-containing solder at their seams, creating a contamination concern. The FDA published its final prohibition on lead-soldered food cans in 1995, with transition periods. This history should not be treated as a description of all modern canned food.
How Many Jars Did Families Need to Get Through Winter?
There was no single universal count. Historical canning budgets considered household size, months without fresh produce, available crops, other food stores, cost, and labor. A 1947 Nebraska Extension circular addressed fruit and vegetable planning for 36 weeks, including several preservation methods.
How Do I Estimate How Many Jars My Family Will Use?
Multiply expected household jar use per week by the weeks you want covered, tracking each food and jar size separately. Three pint jars a week for 36 weeks equals 108 pint jars. This estimates selected pantry use, not a complete diet.
Can Meat Be Canned in a Boiling-Water Bath?
No. Meat, poultry, and seafood need a food-specific tested pressure-canning process. A boiling-water bath and ordinary electric multicooker are not substitutes for the equipment and method specified by research-based directions.
Can All Fruits Be Canned the Same Way?
No. Use directions for the exact fruit, variety, preparation, jar size, and elevation. Many fruits have tested boiling-water processes, but the NCHFP yellow-peach method excludes white-fleshed peaches and recommends freezing white peaches.
Do Tomatoes Need Added Acid for Home Canning?
Follow the exact tested recipe. NCHFP directions for whole, crushed, or juiced tomatoes require specified acidification for both their pressure and boiling-water processes. Do not skip required acid because a tomato tastes acidic.
Does a Sealed Lid Mean Home-Canned Food Is Safe?
No. A sealed lid cannot establish that the food received a safe process. Never taste suspect food or eat food whose safe canning history is unknown. Botulinum toxin cannot be detected by sight, smell, or taste.
How Long Should I Keep Home-Canned Food?
Plan to use properly processed home-canned food within one year for best quality unless product-specific directions say otherwise. Store jars in a clean, cool, dark, dry place. This quality guideline does not make an improperly canned jar safe.